Best Tips to Use Stage Manager on iPad Like a Pro
Though iPadOS already boasts an impressive array of multitasking features, I think Stage Manager is going to overshadow all other multitasking tools. Well, if you don’t believe me, you’ve got to give it a shot. Of course, Stage Manager does warrant a bit of a learning curve up front. However, once you have got a good grip on this new tool, there is a higher chance that it will become your go-to asset.
Ensure That Your iPad is Compatible
First and foremost, make sure that your iPad is compatible with Stage Manager. Yeah, just like many other notable features, Apple has locked Stage Manager to the latest iPad models only. Therefore, check off this requirement without fail. List of iPad Models That Support Stage Manager
iPad Pro 12.9-inch (3rd generation and later) iPad Pro 11-inch (1st generation and later) iPad Air (5th generation)
Turn ON/OFF Stage Manager on iPad
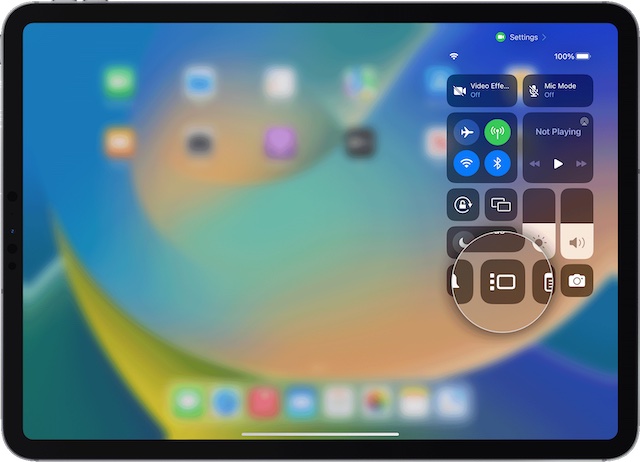
The easiest way to enable or disable Stage Manager on iPad is to use the Control Center.
Simply, bring up the Control Center by swiping down from the top right corner of the screen and then hit the Stage Manager icon to turn it on or off as per your needs.
Alternately, go to the Settings app -> Home Screen & Multitasking -> Stage Manager and then turn off/on the switch for Use Stage Manager on iPad.
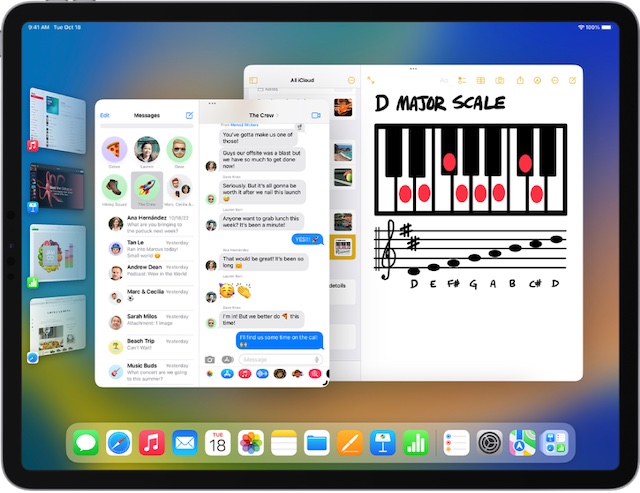
Note that when the Stage manager is enabled, the window you are working on automatically appears in the center of the screen to help you work with the desired peace of mind. And all other apps appear on the list and form a list of recent apps along the left side of the screen, thereby allowing you to switch between them with ease.
How Group Apps Together in Stage Manager on iPad
To take multitasking to the next level, you can group apps together in Stage Manager. For instance, if a specific project requires you to use the Notes app, Safari, and Keynote, you can group them together. This way, you will be able to access these apps with just a click. For a more personalized experience, you can resize, reposition, and overlap windows to ensure everything is in accordance with your workflow.
First off, tap on the Multitasking Controls button at the top of the window.Now, select Add Another Window. Now, the current windows will move aside to display all the other recent app windows.
In order to add one, tap it. After that, touch and hold an app in the Recent apps list and then drag it to the current window in the center of the screen. Besides, you can also touch and hold an app in the Dock and then drag it up toward the center of the screen. Just in case the Dock isn’t visible, you can swipe up from the bottom edge of the screen to bring it up.
Resize Any Window in Stage Manager on iPad
To resize any window, simply drag from the corner marked with a dark curve. If you are using a mouse or trackpad, you can drag from any corner or edge of the window to resize any window in the Stage Manager.
Move a Window to the Recent Apps List in Stage Manager on iPad
You can also move a window to the recent apps list in Stage Manager.
To do so, tap on the Multitasking Controls button at the top of the window and select Minimize.
Move a Window in Stage Manager on iPad
There is also a pretty easy way to move a window in Stage Manager on iPad. Just drag it from the top of the window.
Enlarge a Window in Stage Manager on iPad
Expanding a window in Stage Manage is just as simple.
To do it, tap on the Multitasking Controls button at the top of the window and then select Fullscreen.
How to Close a Window in Stage Manager on iPad
Closing a window in Stage Manager on iPadOS is hassle-free.
Tap on the triple-dot icon located at the top of the window and choose Close. Bear in mind that if a window is part of a group of apps, it will be removed from the group.
How to Get More Screen Space for Stage Manager on iPad
Interestingly, Apple also offers a neat way to get more screen space to work with.
Navigate to the Settings app on your iPad -> Display & Brightness -> tap on View below Display Zoom.Then, choose More Space. It will increase the pixel density of the screen to ensure you can view more in your apps. Times when you are working with multiple windows in Stage Manager or Split View, it will come in super handy.
How to Switch Between Apps in Stage Manager on iPad
Using Stage Manager, you can easily switch apps on your iPad.
To do so, just tap on another app in the Recent apps list. Besides, you can also hit an app’s icon in the Dock to switch to it. The moment you switch to another app, the app or group you’ve been working on automatically goes to the left of the Recent apps list and is immediately replaced by the one you have selected. Alternatively, you can also swipe up from the bottom of the screen and then pause in the center of the screen to view the recent apps and groups. Another way to get it done is to just swipe left or right with one finger along the bottom edge of the screen. Do note that on an iPad with a Home button, you will need to perform this gesture with a slight arc. Then, swipe left or right with four or five fingers.
Hide or Show the Recent Apps list in Stage Manager on iPad
Depending on your needs, you can choose to hide or show the recent apps list in Stage Manager.
Bring up the Control Center -> touch and hold the Stage Manager button and then hit the checkmark on the left side of the image. Alternatively, head into the Settings -> Home Screen & Multitasking -> Stage Manager. Next, tap the checkmark below Recent Apps to enable/disable it.
Pro Tips to Get the Most Out of Stage Manager on iPad
There you have it! So, that’s how you can enable and use Stage Manager on your iPadOS device. Now that you have unraveled all the tricks, make the most of them to enhance your productivity. And yes, if you have any related questions, be sure to shoot ’em up as well. Read more: Stage Manager Not Working in macOS 13 Ventura on Mac? Here’s the Fix!

