What is Refresh Rate?
When we look at any content on a screen, the pixels behind the screen refresh many times to make the animations smoother. The refresh rate accurately measures the number of times your screen refreshes in a second. The unit to measure refresh rate is Hz(Hertz). You might have heard about the 60Hz display. It simply means a Display with a 60Hz refresh rate will refresh 60 times in a second. With the advancement in Display technologies, now we have Displays clocking high refresh rates ranging from 90Hz, 120Hz, 144Hz, 240Hz, and up to 360Hz. You might be wondering why everyone is crazy about high refresh rates. The higher the refresh rate, the smoother the screen animation will be. Scrolling feeds, watching content, everything feels smoother on a high refresh rate Display. Now when you know what refresh rate is is, let’s understand how you can change it in Windows 11.
Change Refresh Rate in Windows 11
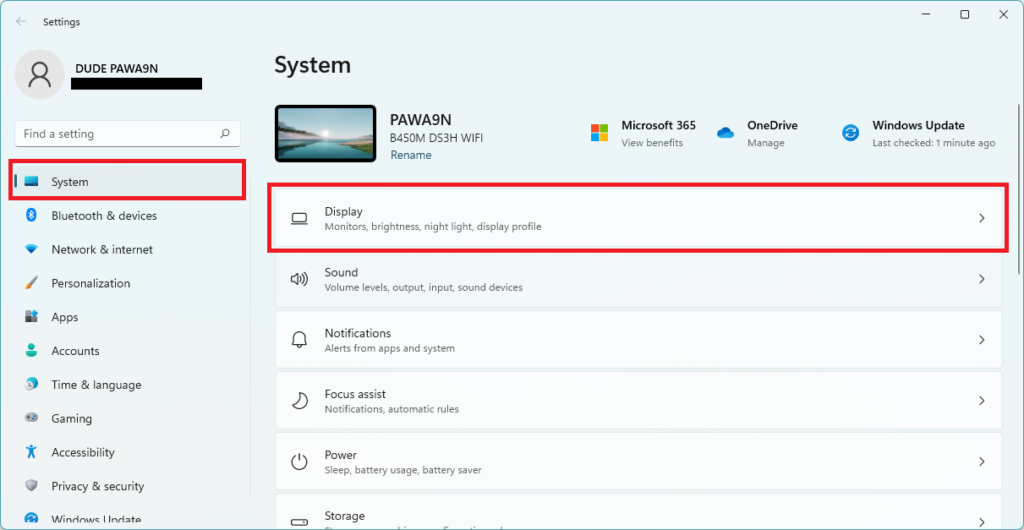
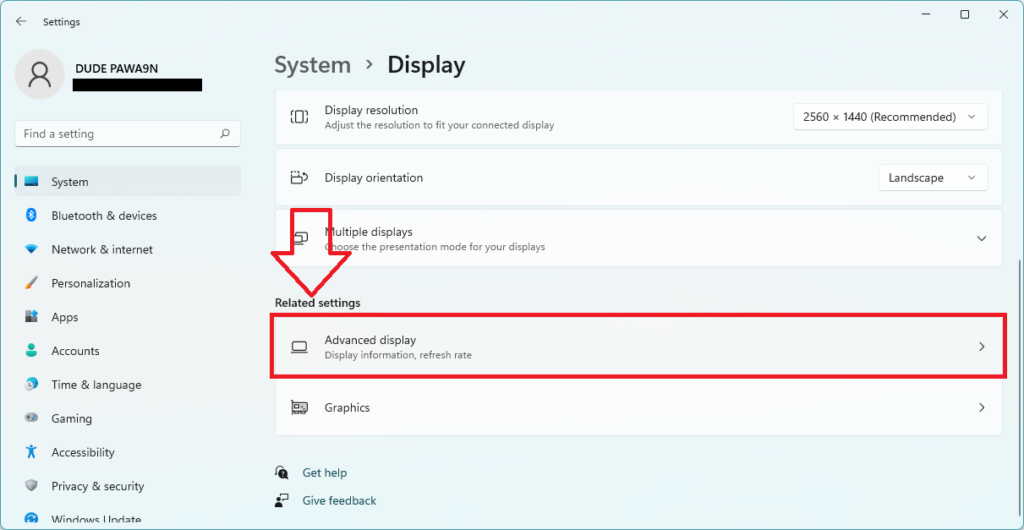
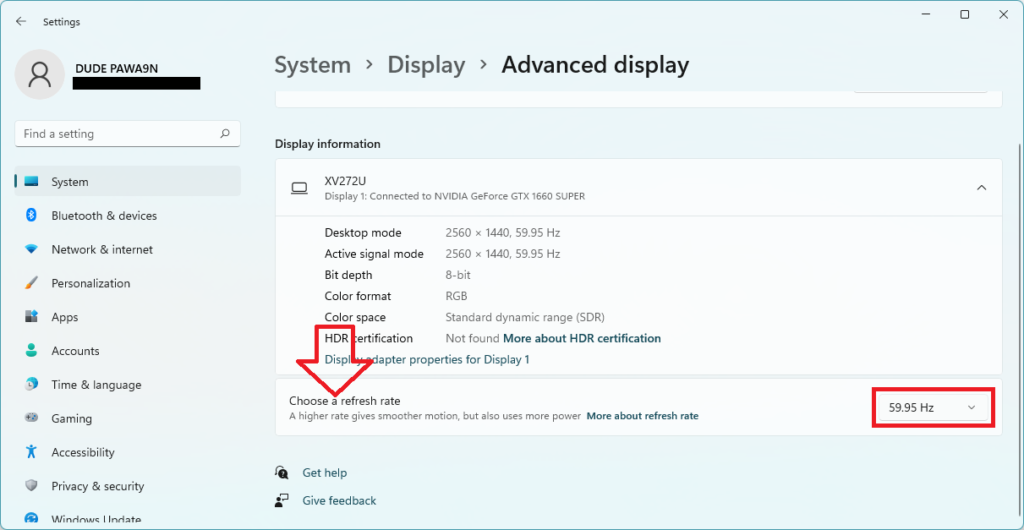
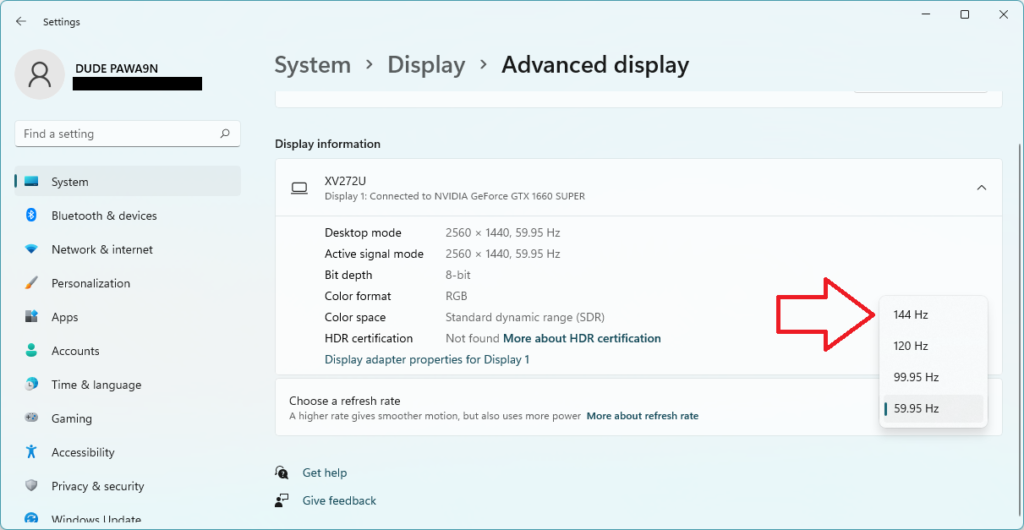
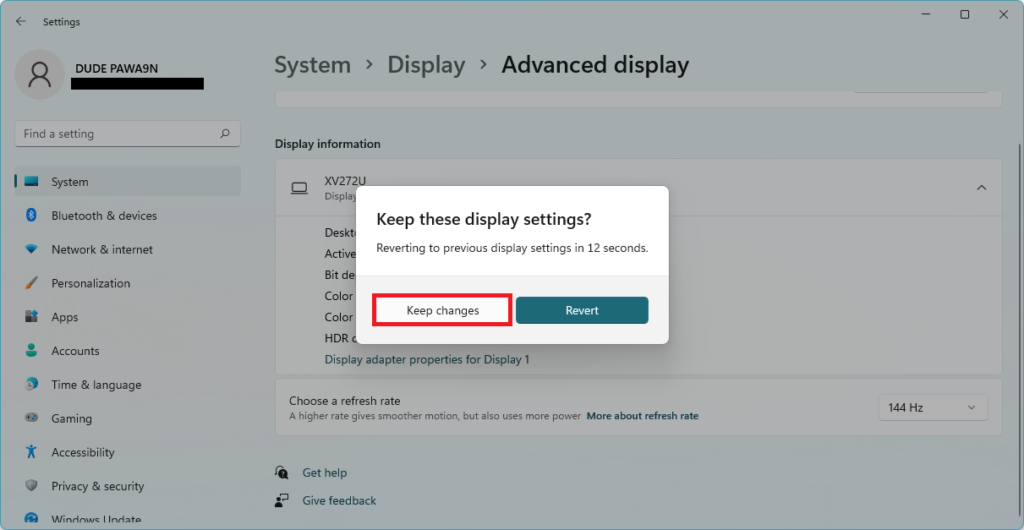
Microsoft has added an option in the built-in settings app; users can change the refresh rate in Windows 11. The option is slightly off the sight in the settings app, so a normal might not be able to find it. Follow the below steps to change the refresh rate in Windows 11. Step 1: Type Windows Key + I keyboard shortcut to open the Settings app on your PC. Alternatively, you can search for the settings from the search bar. Step 2: In the Settings app, tap on the System. Under System settings, tap on the Display section. Step 3: In the Display, section scrolls down to Related settings. The very first option under Related settings will be Advanced Display, tap on it. Step 4: Under the Advanced Display section, look for Choose a refresh rate option. It will show the refresh rate currently in use on your PC. Step 5: There will be a drop-down menu icon next to the current refresh rate, tap on it. Now the system will show all the available refresh rates for your PC. Select the refresh rate you want to choose. After selecting the new refresh rate, the display will slightly flicker to adjust the newly selected refresh rate. Note: I would like to note here that the available refresh rate options will entirely depend on your PC’s display. If you have a standard Display, you might not have a higher refresh option. Step 7: After it, you will receive a prompt on your screen. It will have two options: Keep changes and Revert. Tap on keep changes to go ahead with the newly selected refresh rate. In case you want to go back to the previously fixed refresh rate, tap on the Revert button. Note: Make sure to provide input here to change the refresh rate as if you do not give any information, the system will automatically revert to the previous refresh rate. How do I enable 144hz on Windows 11? You can enable 144h on Windows 11 from the built-in settings app under Display settings. I have provided the exact steps required above in this article. How do I change my refresh rate? You can easily change the refresh rate in Windows 11 from the settings app. Open Settings on your PC and follow the steps provided in the article above.
Final Words
You can easily change the refresh rate in Windows 11 by applying the steps provided above in the article. It is a matter of a few clicks. I hope you will change the refresh rate on your PC following the steps provided above in this article. If yes, do let us know by dropping a comment below.